I recently got a CRICUT!
I’ve been wanting one for years. I actually considered the Silhouette at first because I’ve read the design software is much easier to use if you have experience with Photoshop (and I do). But in the end, I chose the Cricut because many of my friends have this one (hello Cricut Crafting Parties!) and materials for it seems more widely available. Plus, it was on major sale at Michaels. It never goes on sale!
So after 3 weeks of sitting on the floor of my closet, I finally ripped that baby open and started. Here’s what I discovered as a Cricut Beginner.
#1. Be stingy!
Don’t throw anything away! Keep it. You will find a use for that 1″ piece of vinyl. You never know if you might need to make a period for a quote or patch up a project that got worn over time.
And the ultimate tip: use that transfer tape over and over until it no longer works. I’ve heard one piece can be used up to 7x!
#2. Even if you know Photoshop, you will have to relearn Design Space from scratch.
I have been an avid user of Photoshop since my teen years and I’d say I’m more than a beginner. When I opened up Design Space (the design program made especially for Cricut), I thought I was reading a new language. It was hard to learn! I guess I was too used to Photoshop. I had to play around with it for awhile before understanding the basics. Some people who aren’t familiar with Photoshop may not have as much trouble with it. I guess it’s sort of the same as going from Mac OS to PC: similar outcome, different way to get there.
My tip is to take your time and play around with it. Don’t expect to get it right away.
#3. You will have the Cricut on the wrong setting at least once and waste the very expensive vinyl.
It happens! You set the machine to cut cardstock for your last project and then you forgot to change it to cut vinyl for the next one. And it cuts right through. Oops.
Solution: Leave the dial on ‘custom’ and the machine will prompt you to set the dial on the right option each time you start a new project. And this brings me to my next point. If you screw up……
#4 …There is more than one way to do apply a vinyl.
I put the machine on the wrong setting for my first project and it cut through the vinyl completely! It wasn’t a complete disaster because I was able to salvage it. It was my nephew’s name so only 5 letters. I started peeling each letter one by one and then applied it that way, essentially like a sticker. I had to make sure each letter was spaced out evenly and it was straight.
A ‘normal’ person would use transfer tape. Transfer tape allows you to pick up the entire image that was cut and put it down at the same time. So in the case of the name, I would’ve been able to put down all 5 letters at once without worrying about spacing.
#5. You will meet new friends who are also Cricut obsessed.
Cricut owners like scrapbooking and cardmaking fans, are very good at finding one another. Strangers will share projects and tips with you. One stranger even told me exactly what I needed when I was completely lost in the Cricut aisle at Michaels.
Here’s my very first project: Personalized Christmas Ornaments
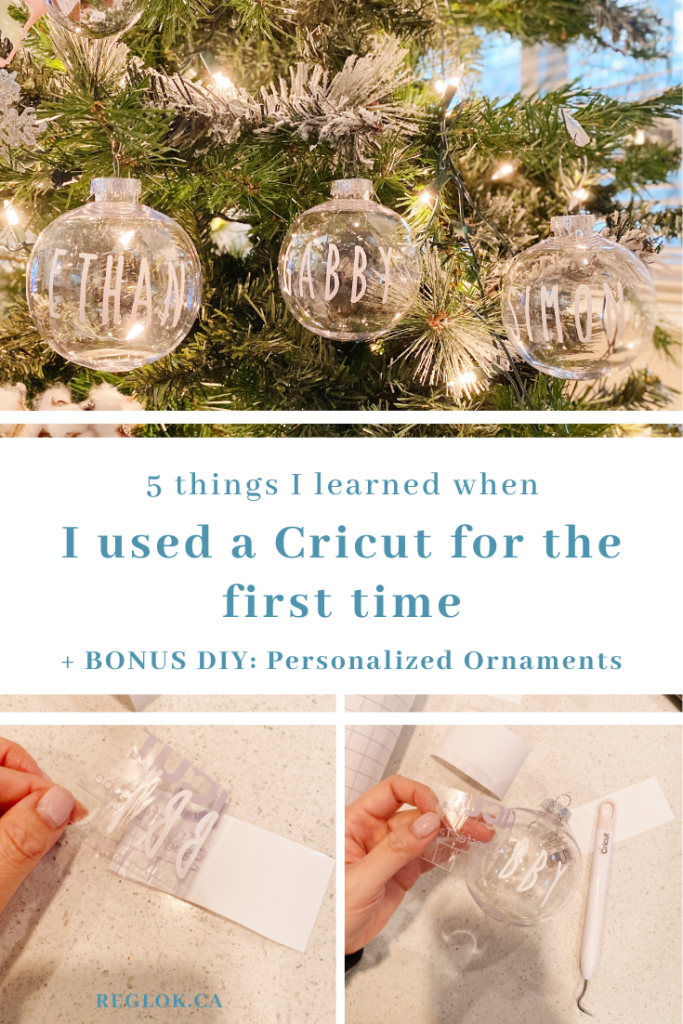

These are all over Pinterest but instead of having you do another Pinterest search for it, I thought I’d share how I did it.
MATERIALS
- Cricut Explore Air 2 or Maker
- plastic ball ornaments or these without the silver tab
- removable vinyl, white or removable vinyl, black
- scissors
- sticky mat
- transfer tape
- weeder
Materials are also available on my Amazon Store:
- plastic ball ornaments or these without the silver tab
- removable vinyl, white or removable vinyl, black
- transfer tape
- weeder

1// I chose the font I wanted the name to be in. I chose SKINNY.
2// I used the text option on Design Space and let the machine do the cutting.
3// I used the weeder to take off the ‘negative’ part of the vinyl. Don’t forget the insides of O’s and P’s and R’s, etc.


4// Then I cut a piece of transfer tape the same size as the name.

I applied the transfer tape to the vinyl, making sure I line up the bottom so that it is straight. I press down to ensure the vinyl is stuck on it.

5// I peel off the backing. The vinyl should be attached to the transfer tape.

6// Then I position it onto the ornament and press down firmly, starting from the centre and move out. There might be some bubbles or wrinkles. That’s ok. Take the weeder to gently lift the vinyl and then reposition to smooth it out.

7// LAST STEP. Peel back the transfer tape slowly and the vinyl should adhere to the ornament.

VOILA!

Feel free to embellish them too…with ribbon or wherever your creative minds take you. 😊


Tell me, what was your first Cricut project if you have one? If not, what would you like to make with a Cricut?

Disclosure: I am a member of the Cricut Affiliate Program. Purchasing through these links allows me to continue to create content like this.
